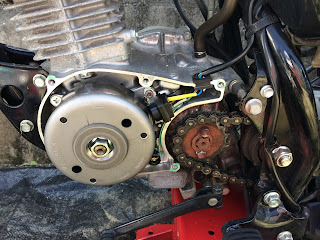
When I changed the tires on Jill I didn't give the current chain much thought, I just let it hang loose off the sprocket collecting water and sand and dust - because I would change it once the new tire fits into its place.
Oh well, this is a typical How-Not-To-DIY episode.
I didn't have a chain cutter nor a grinder so I thought I could just remove the chain from both sprockets and put in the new chain.
So I set out to open the crankcase cover.

I used brake cleaner to soak them and then scrap it off with a plastic kitchen-scrapper.
This was the result of the scrapping.
In goes a new non-genuine-part gasket. It felt a bit thinner than the green one.Here is how it looks on the engine block.
The gasket went in without drama and all was good. But the catch is this: I wasn't able to replace the chain. Why? because even by removing the chain from the sprockets, it wouldn't come off the bike for there is no clearance between the frame and chain.
Oh..... stupid me. Should have checked first before I set out to do all the work.
So there was the lesson #1. Know what you are doing before actually set out to do it.
I still have another lesson learned. Lesson #2, wear protection!!!
Cheers,
CK


No comments:
Post a Comment